
IG stories are one of the most powerful ways to make an impact on an audience that you would like to reach. You can share photos or videos and if you would like to keep them around more than 24hrs you can feature them on your Instagram profile. When someone (entirely new) visiting you profile they want to know more about you, who you are and what do you do. To give them a little overview (like a trailer ) the best way to do this is with Instagram story highlights where you can share anything you would like.
Let's say a link to your business/ website, some photos/videos of your real life, behind the scenes or where you been before.
This tutorial will show you step-by-step how to create the Instagram Stories Highlights covers.
One of my favourite design tools is Canva. It's super easy to use, and it's free.
I usually use the desktop version, but today I will be showing the app as it already has templates for Insta Stories. If you prefer the computer, you can use the “Custom Dimension”. IG story size example is 1080 pixels width x 1920 pixels height.
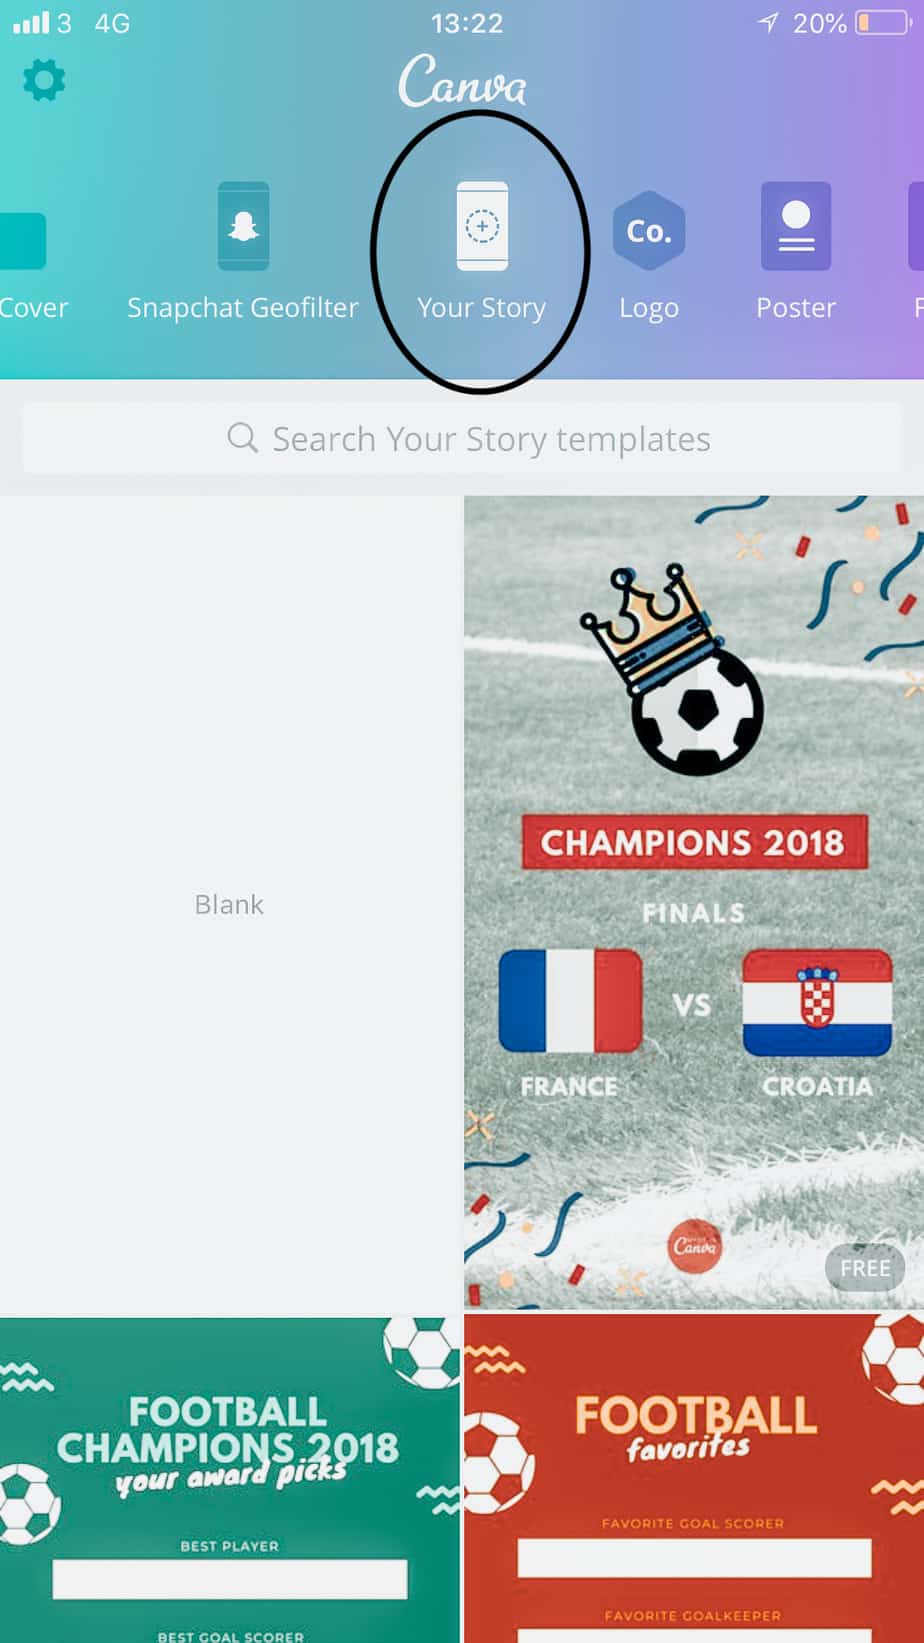
1) Select the template
The first step is to open the app, and at the top, you will see all the different designs you can make. For Insta stories you need to select the “Your Story”. I love Insta story covers with a background colour and a simple icon in the middle. For this, you need to select the very first template.
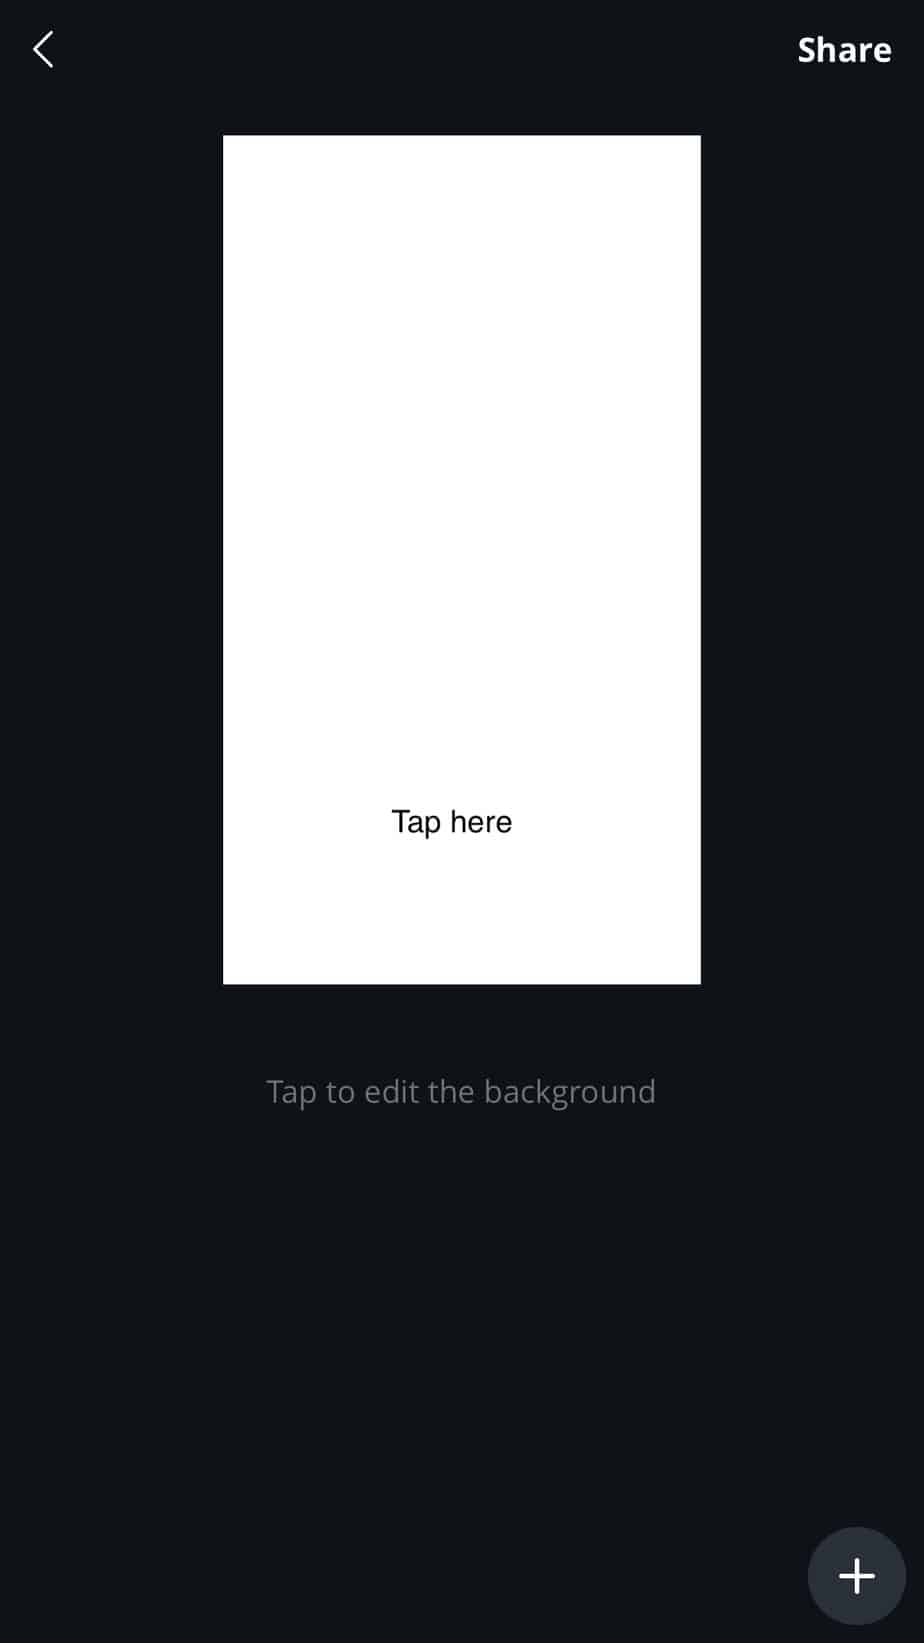
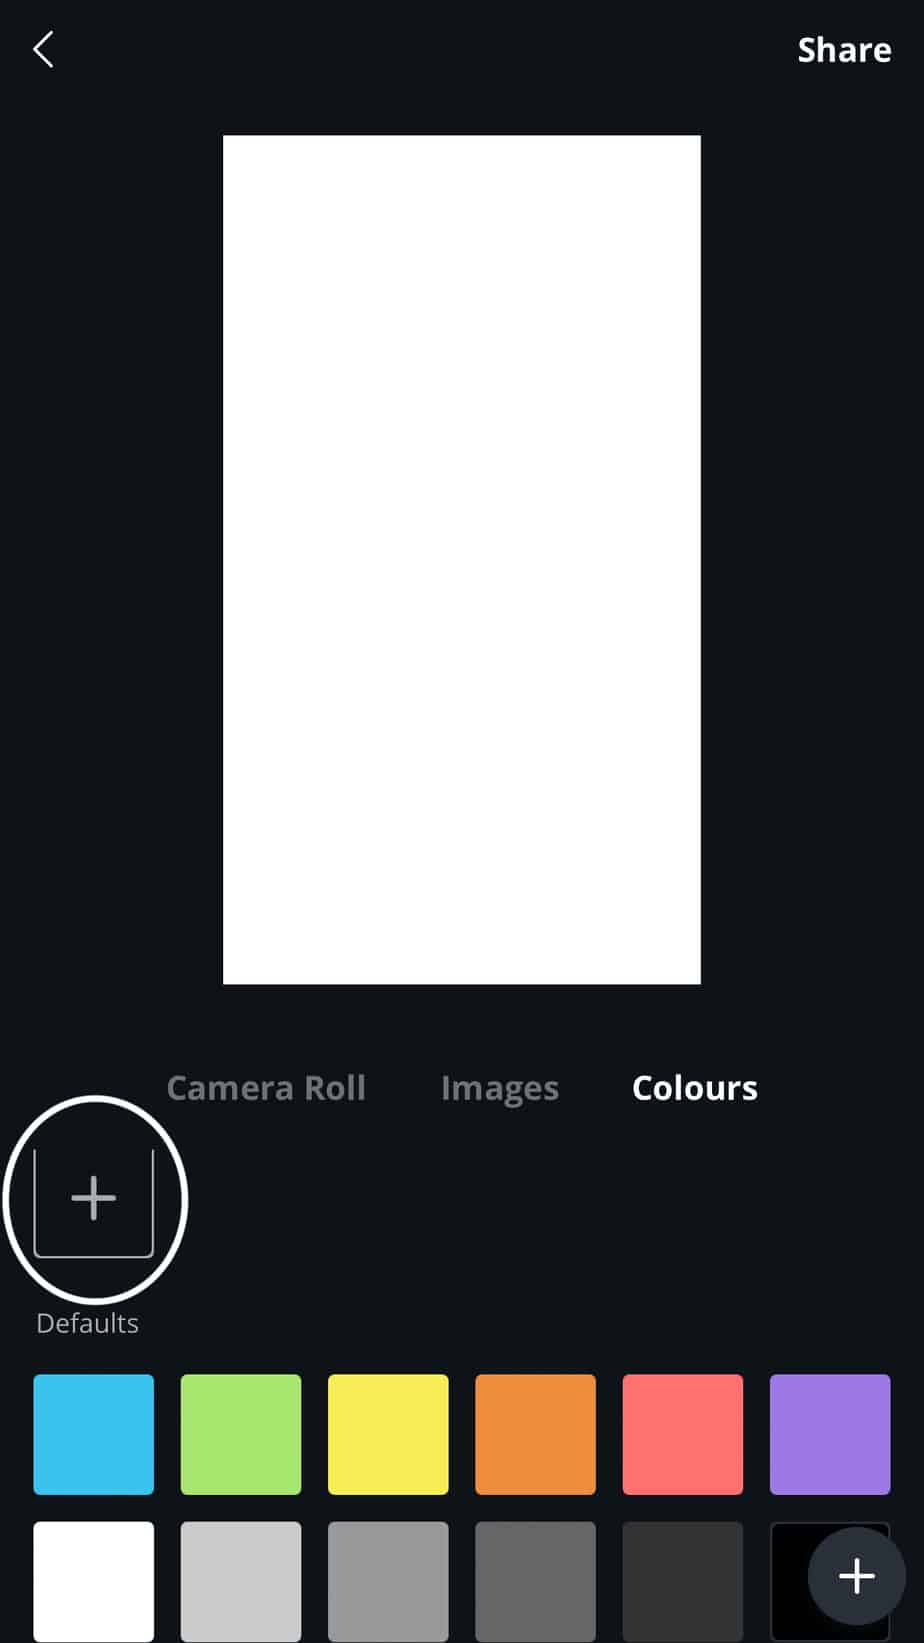
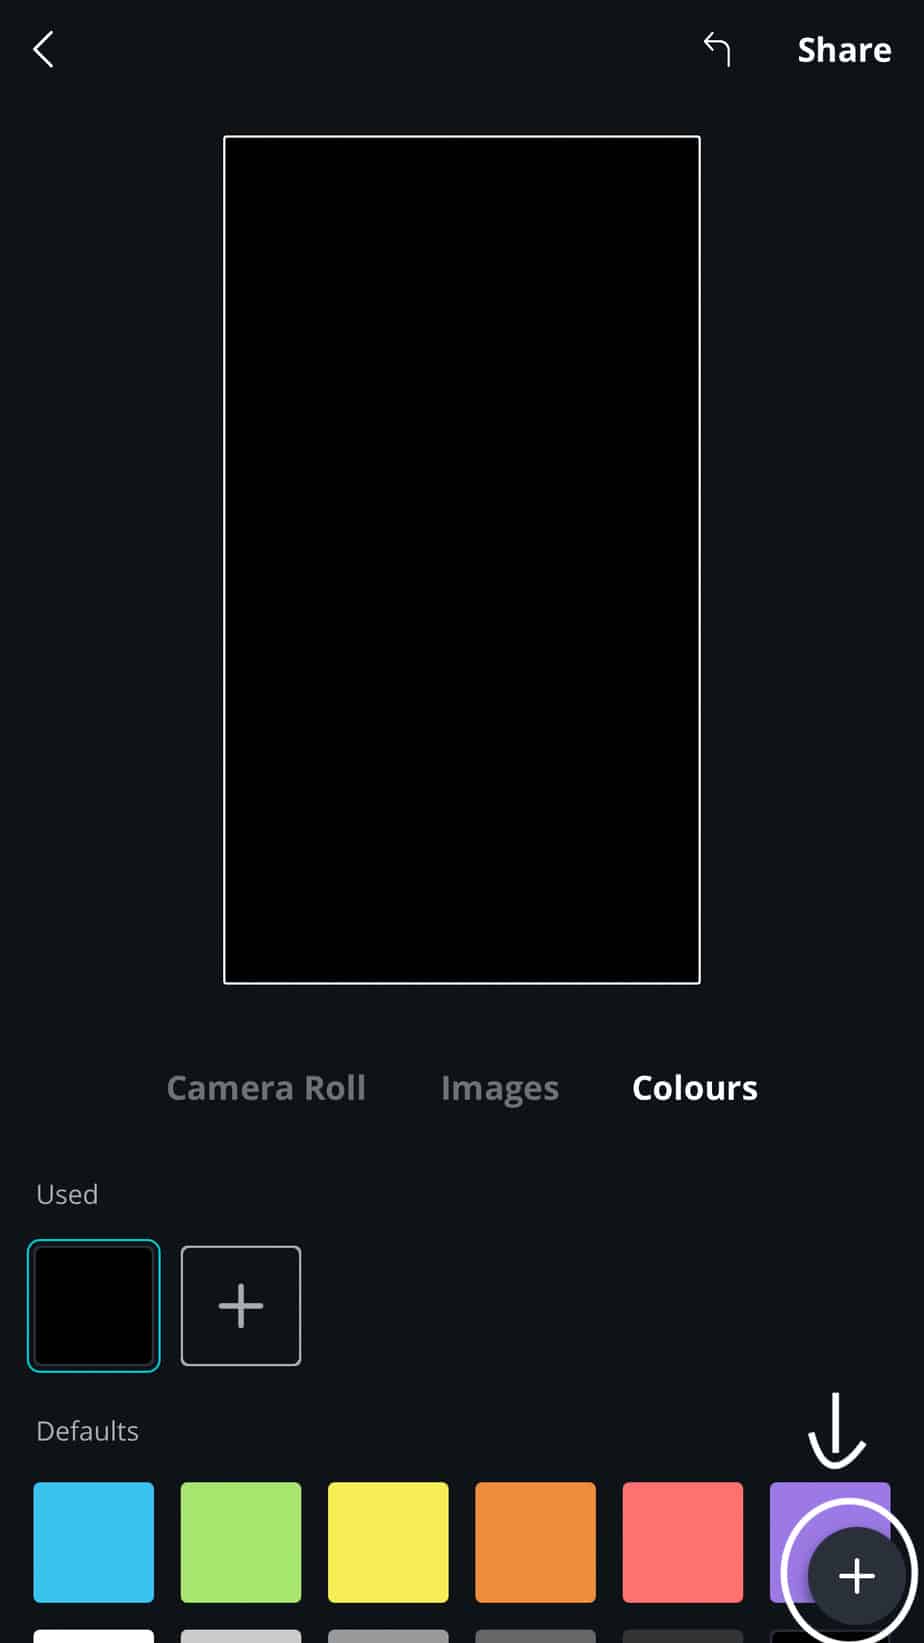
2) Choose your background
So by now, you should have a white blank page, and at the bottom of the page, you can see all the different colours that you can choose from. If you prefer a personalised shade just press "+" and enter your colour code.
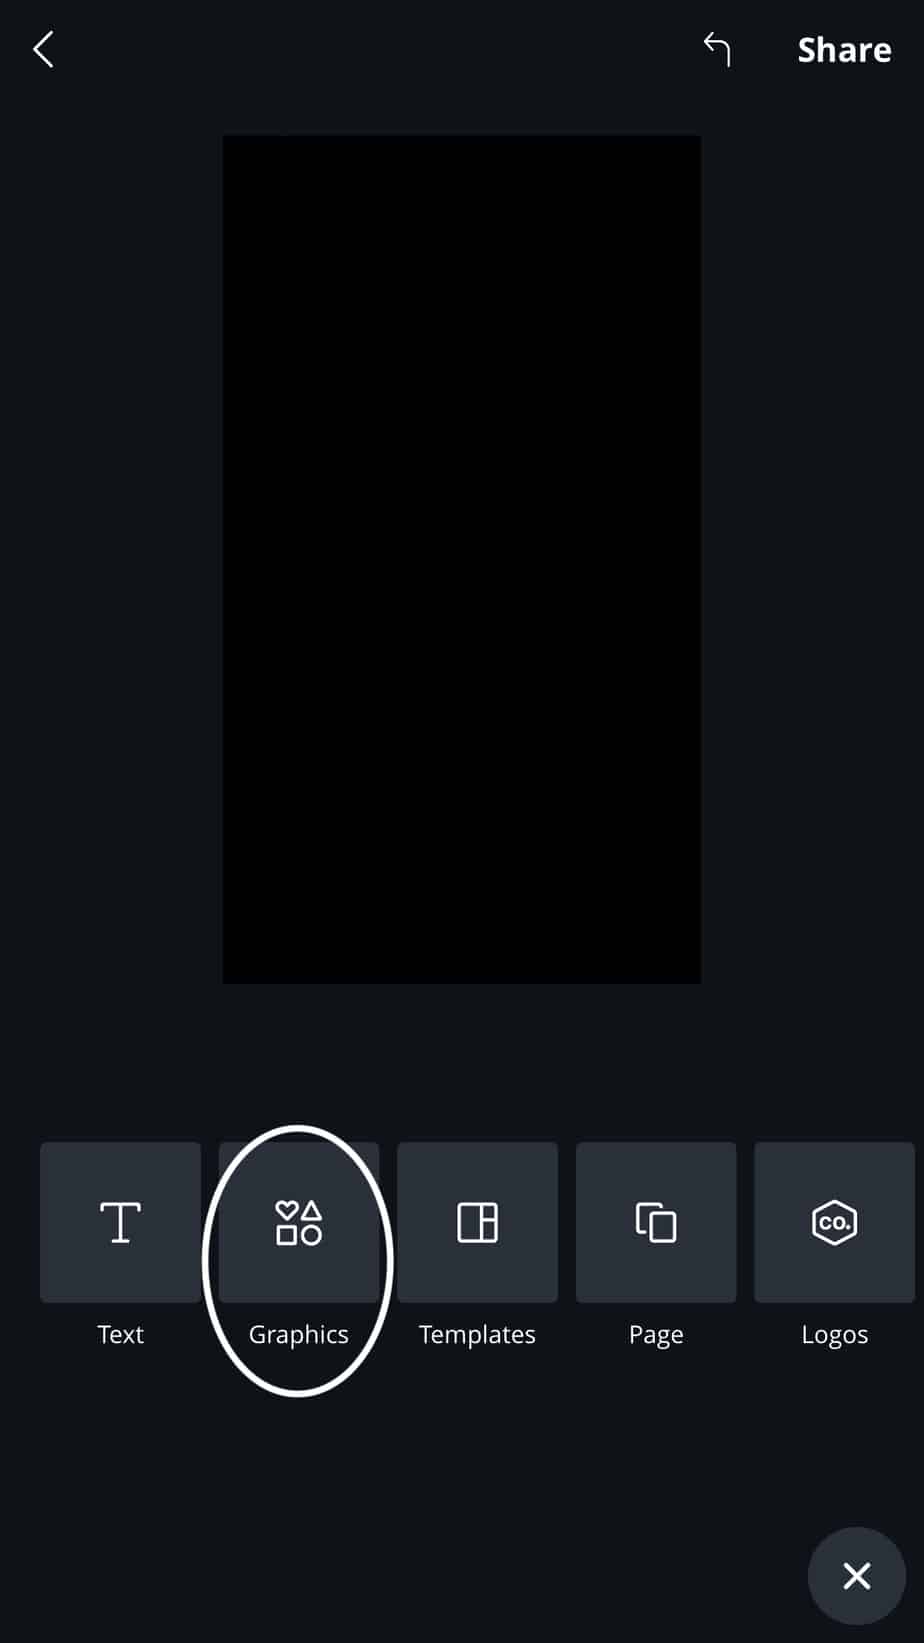
3) Pick and customise your icon
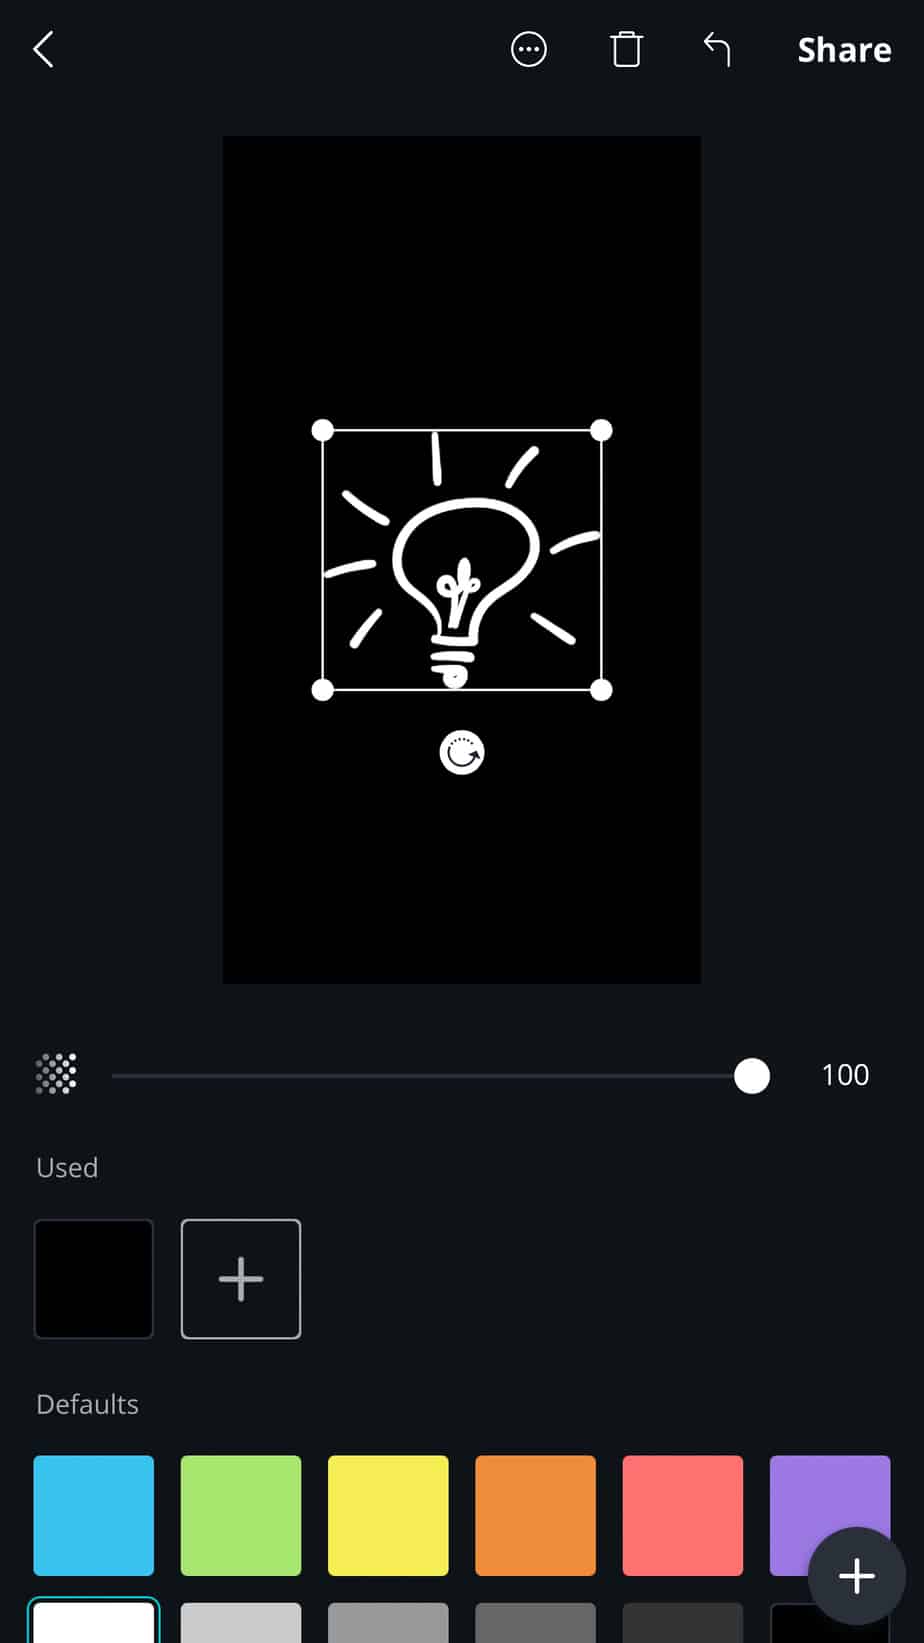
To add an image to your cover select the "+" on the bottom of the page. Right corner. After selecting the "Graphics" option and look for the icon you would like to choose for your IG story cover.
If you wish to change the colour or the brightness of the icon you can do that below, on the bottom of the page. I wanted something for my DIY category story highlight, so I picked this below.
4) Save your work
If you would like to do more than one cover, you add pages to design more. Press the "+" on the bottom of the right corner then click on "pages". Again the same steps as before.
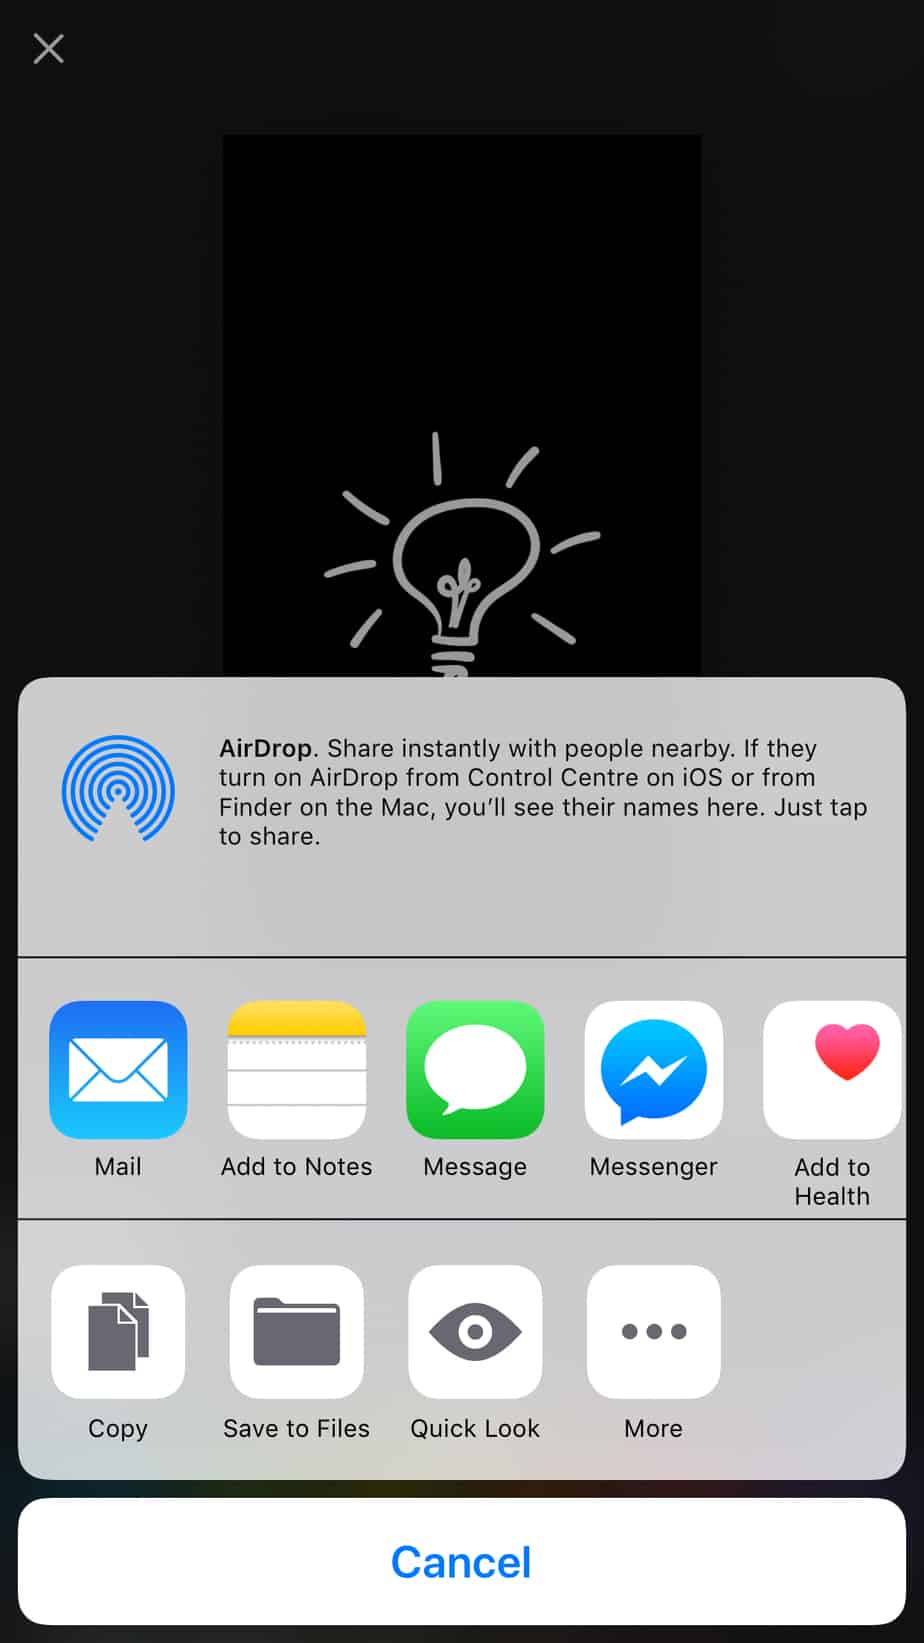
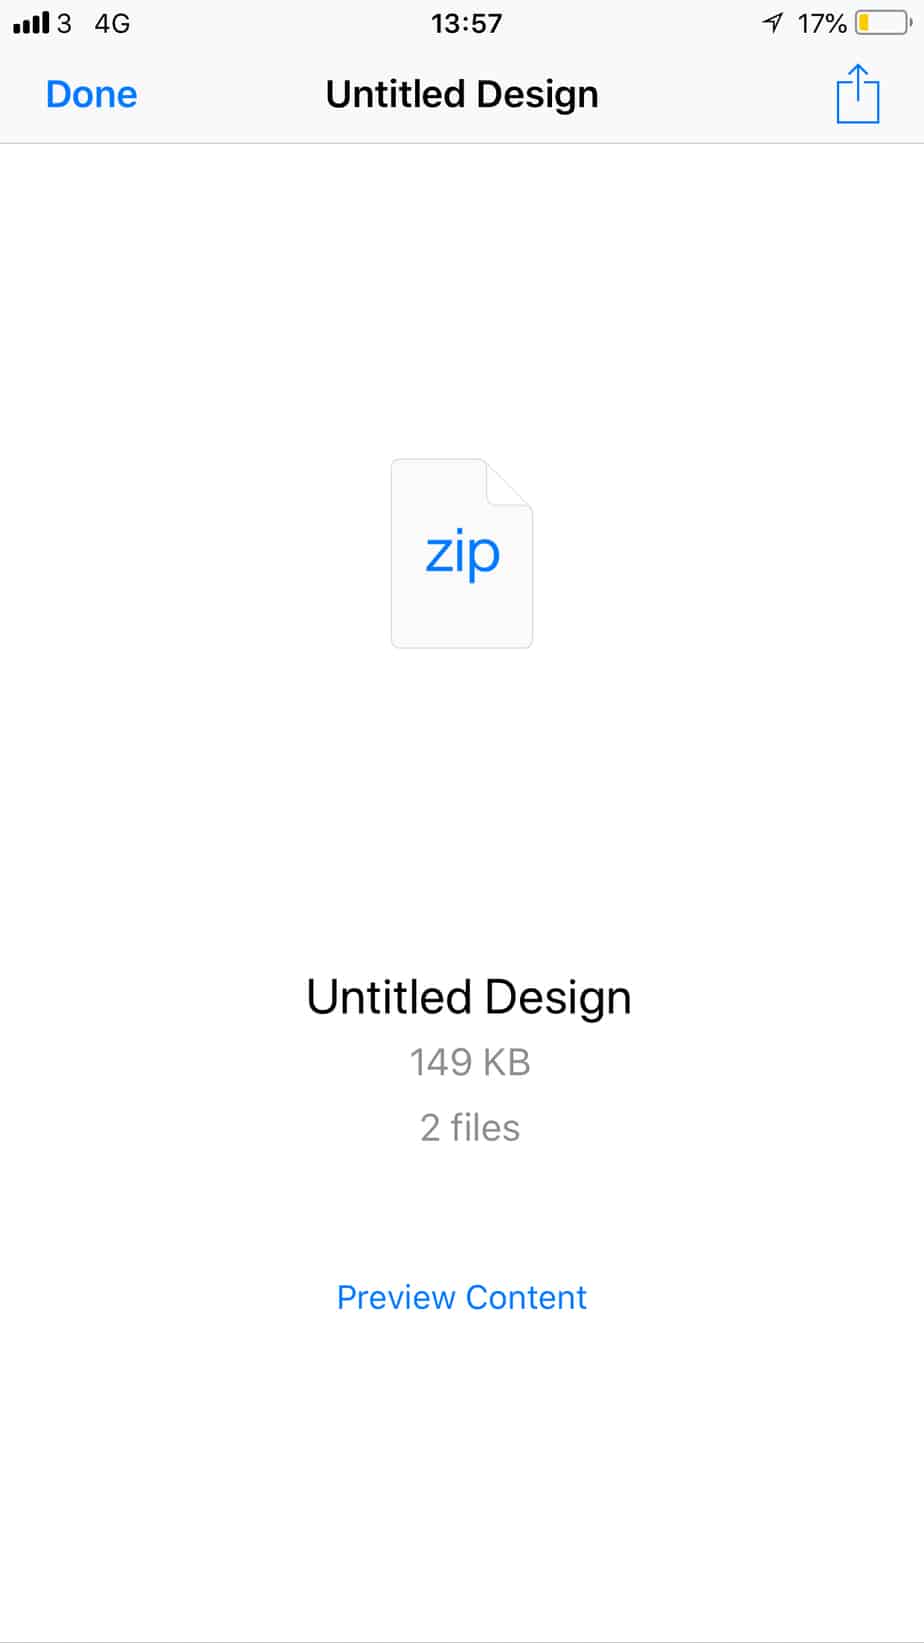
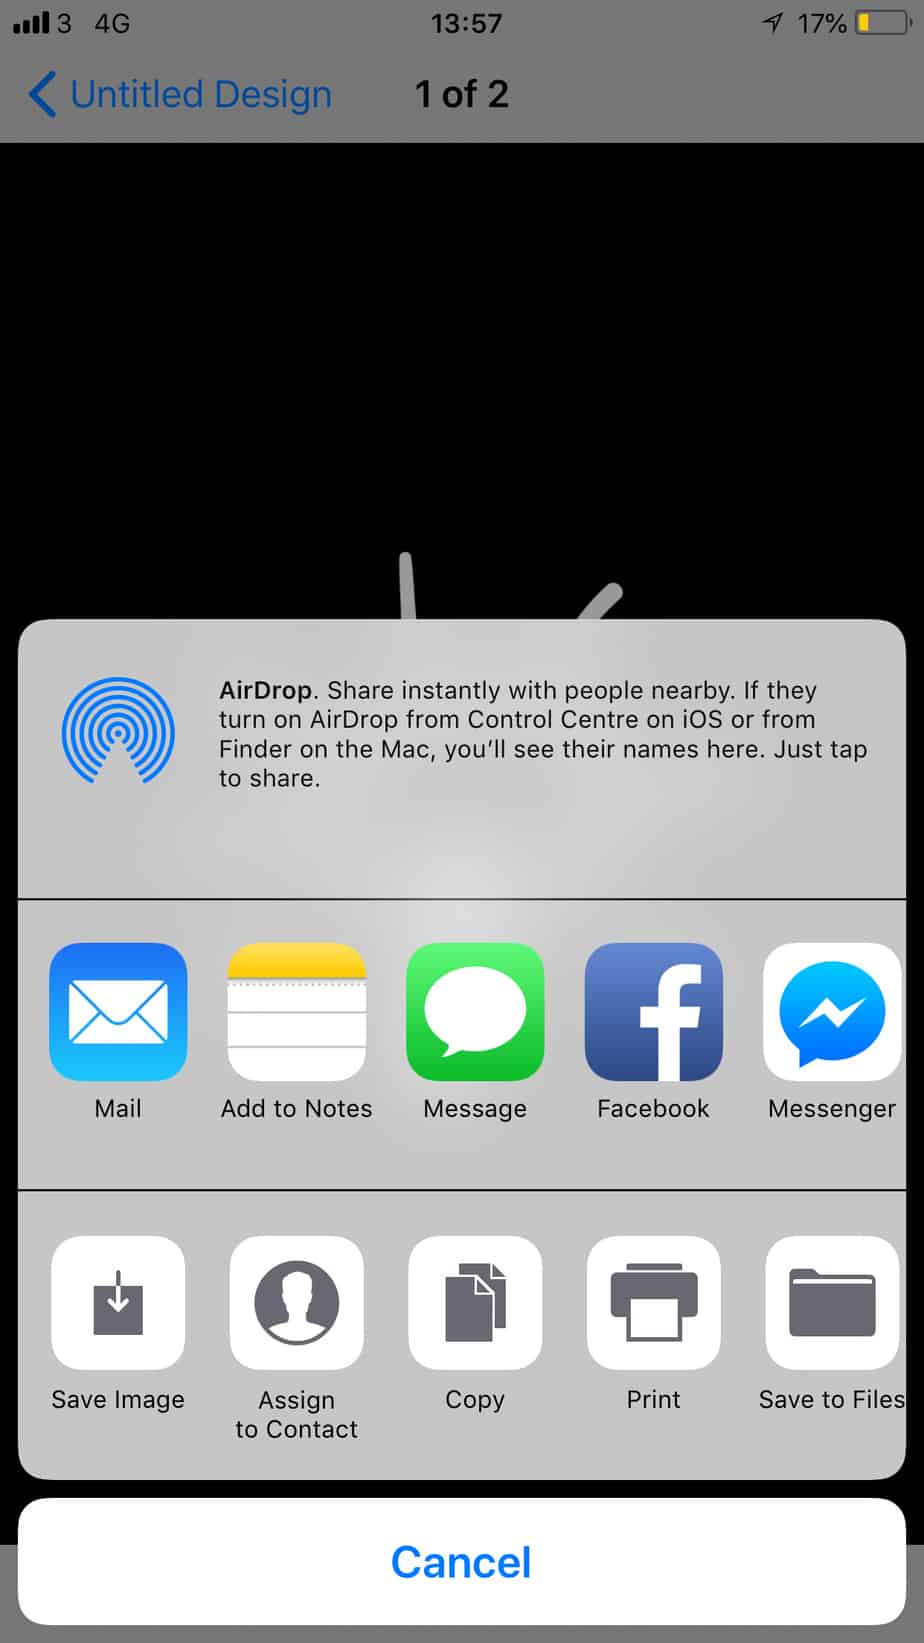
When you are done just click "share" on the top right corner after press "quick look","preview content". Once you are happy with your work click on the bottom of the left corner and select the first option "save image".

There you go 4 super easy steps to create beautiful covers with icons for your Instagram. However, if you prefer the text instead of the icon, you can also create that in Canva, or you can use Word Swag. My second favourite app to design anything easily. It's not free, but it's really worth to pay that £4.99 as you can use it for so many other things to design. You can purchase this in your app store.
How to use Word Swag to create your Insta story highlights covers
1) Pick your template
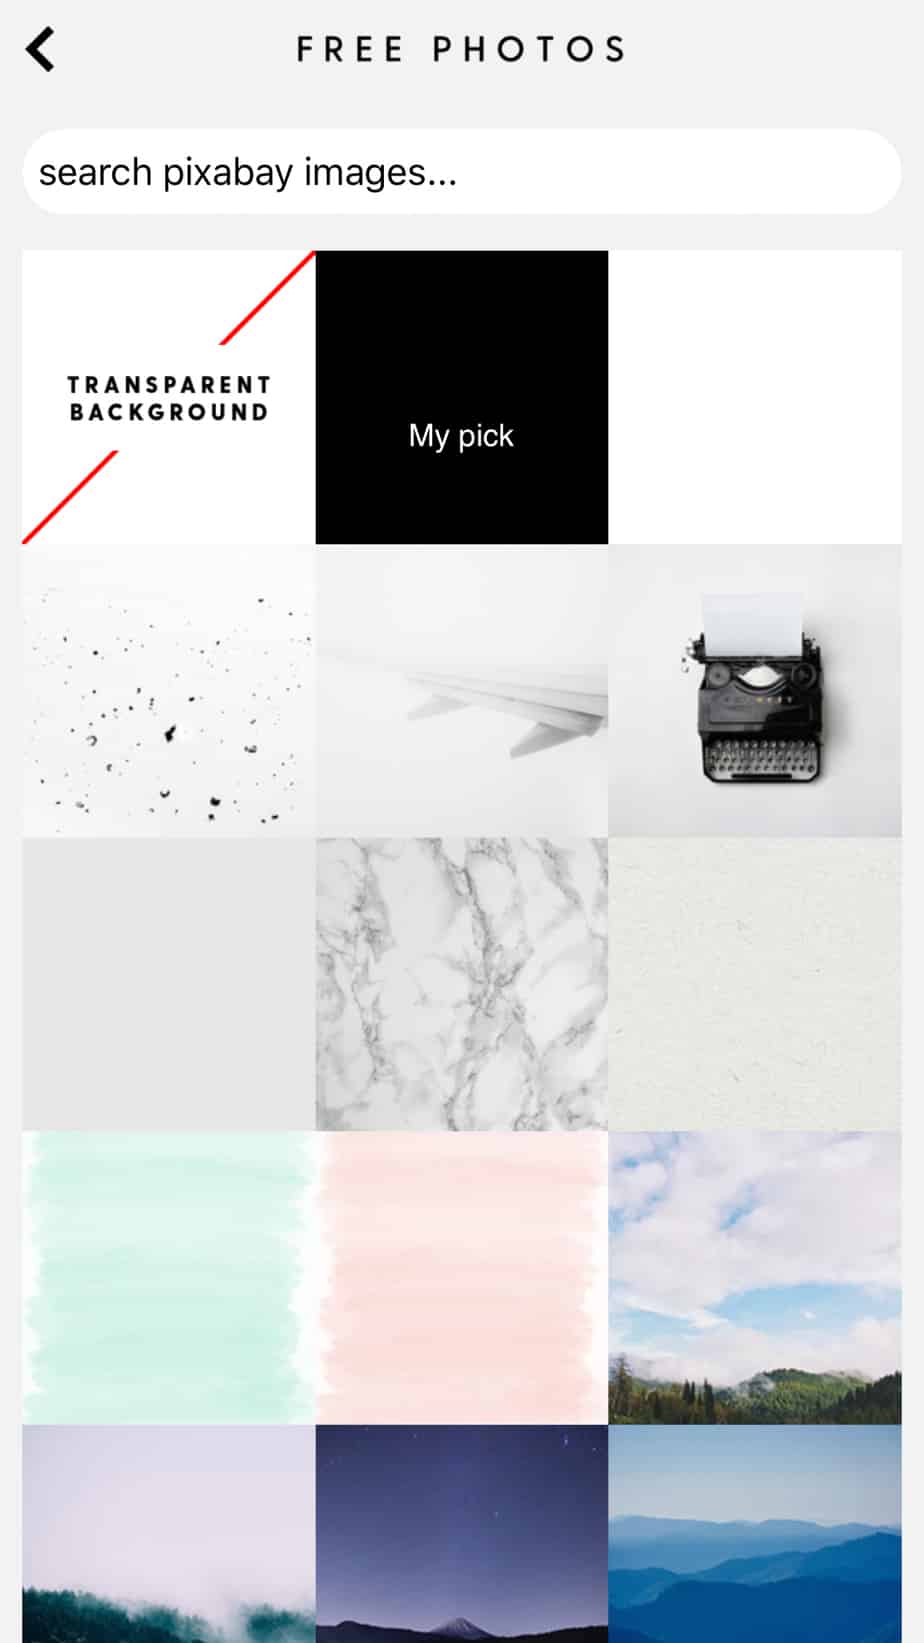
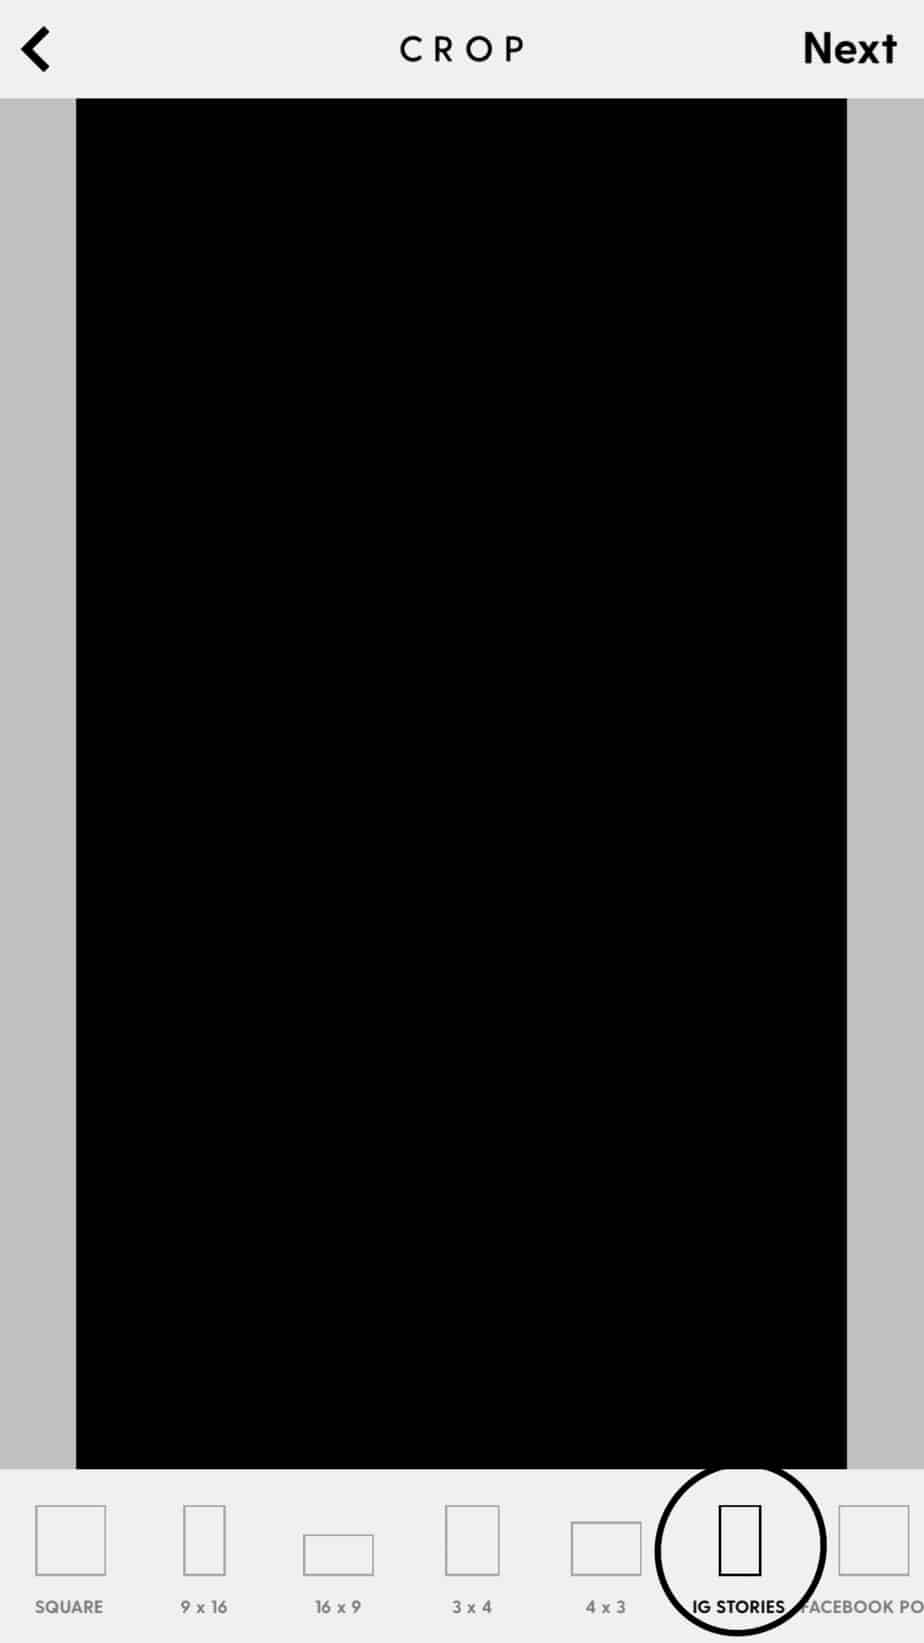
When you open the app, you will find three categories at the bottom of your screen. If you would like to use your own photo as a background pick " library" or you can take a picture when you select the "camera" icon.I'm going to pick the "free photos" option. Scroll down and select whichever goes with your theme. Then swipe right and select the "IG stories" and this will crop your template for the right size.
Now click on the right top corner where you can see "next".

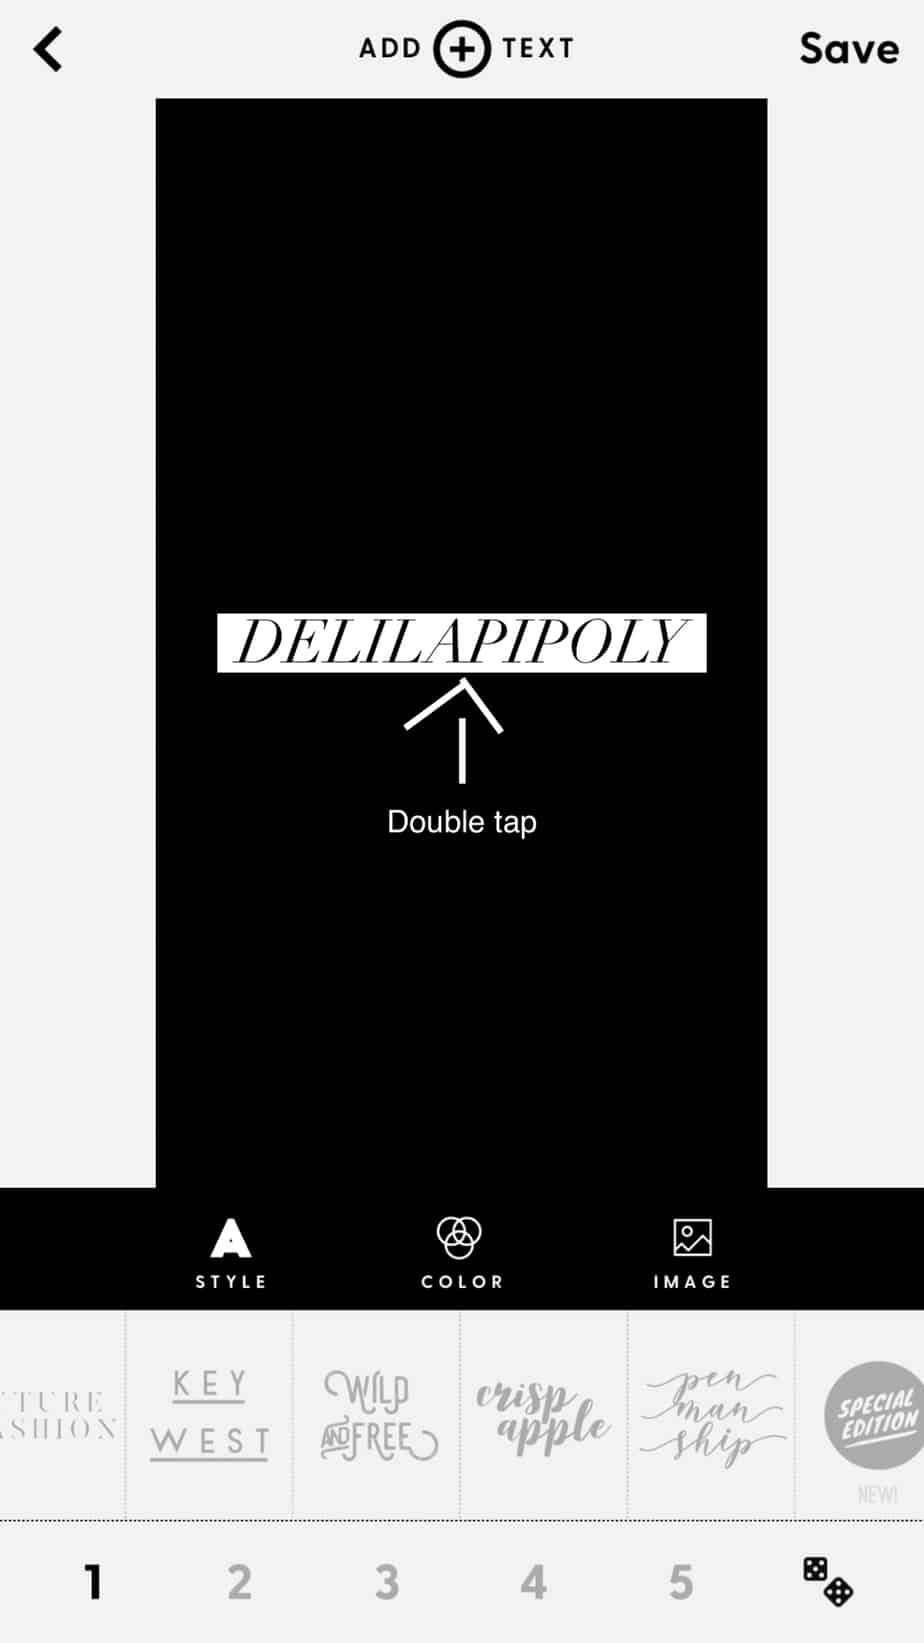
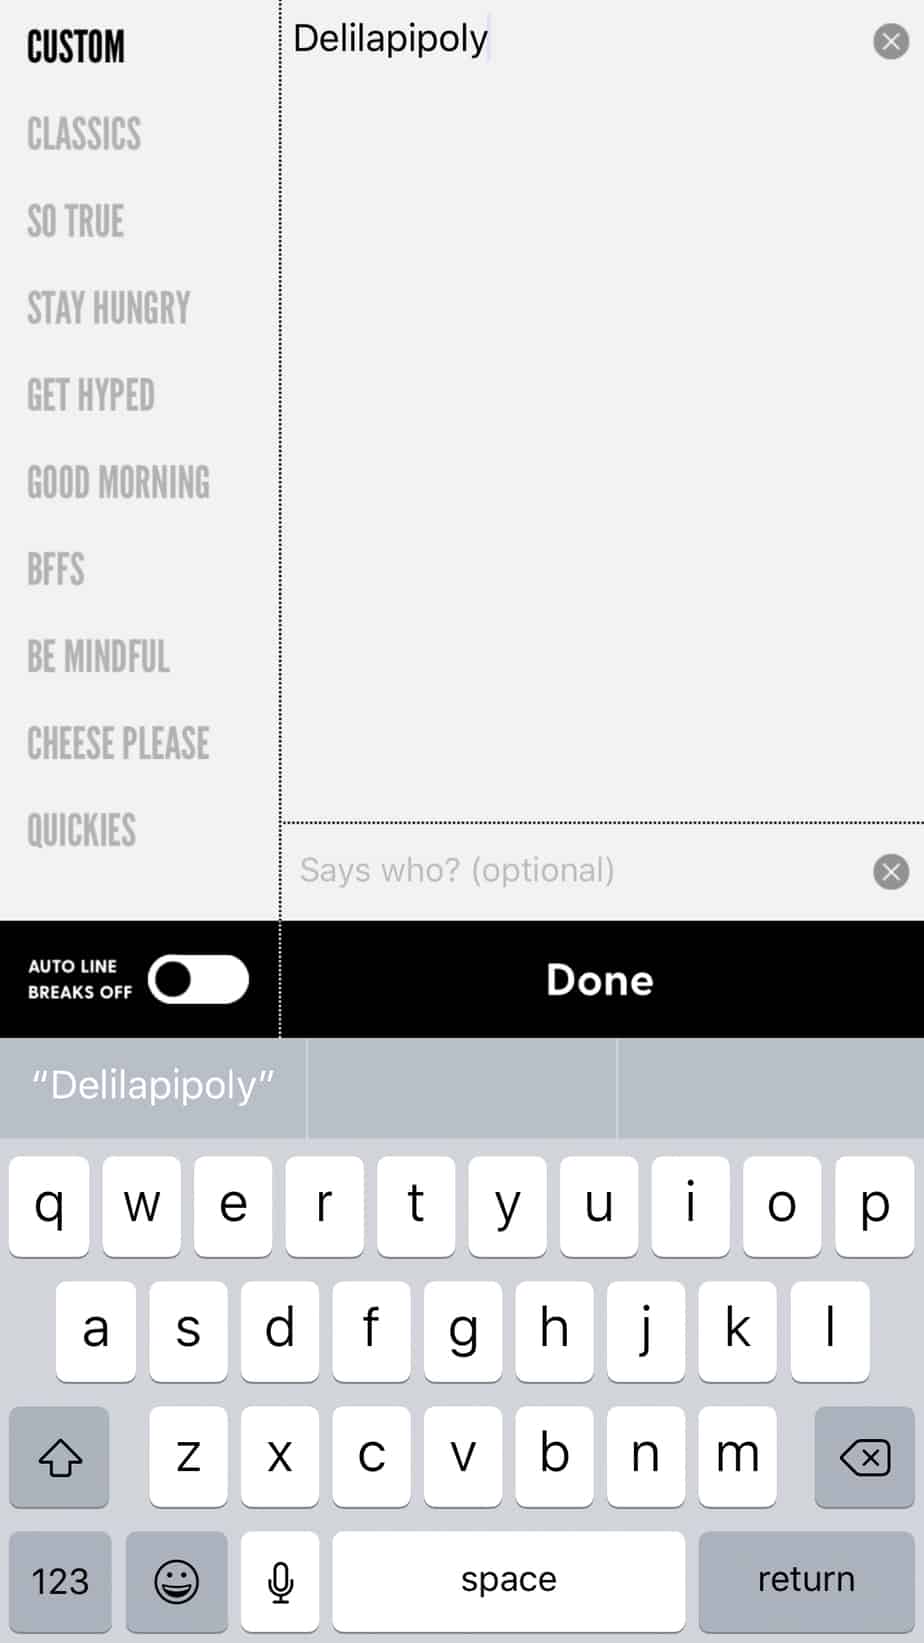
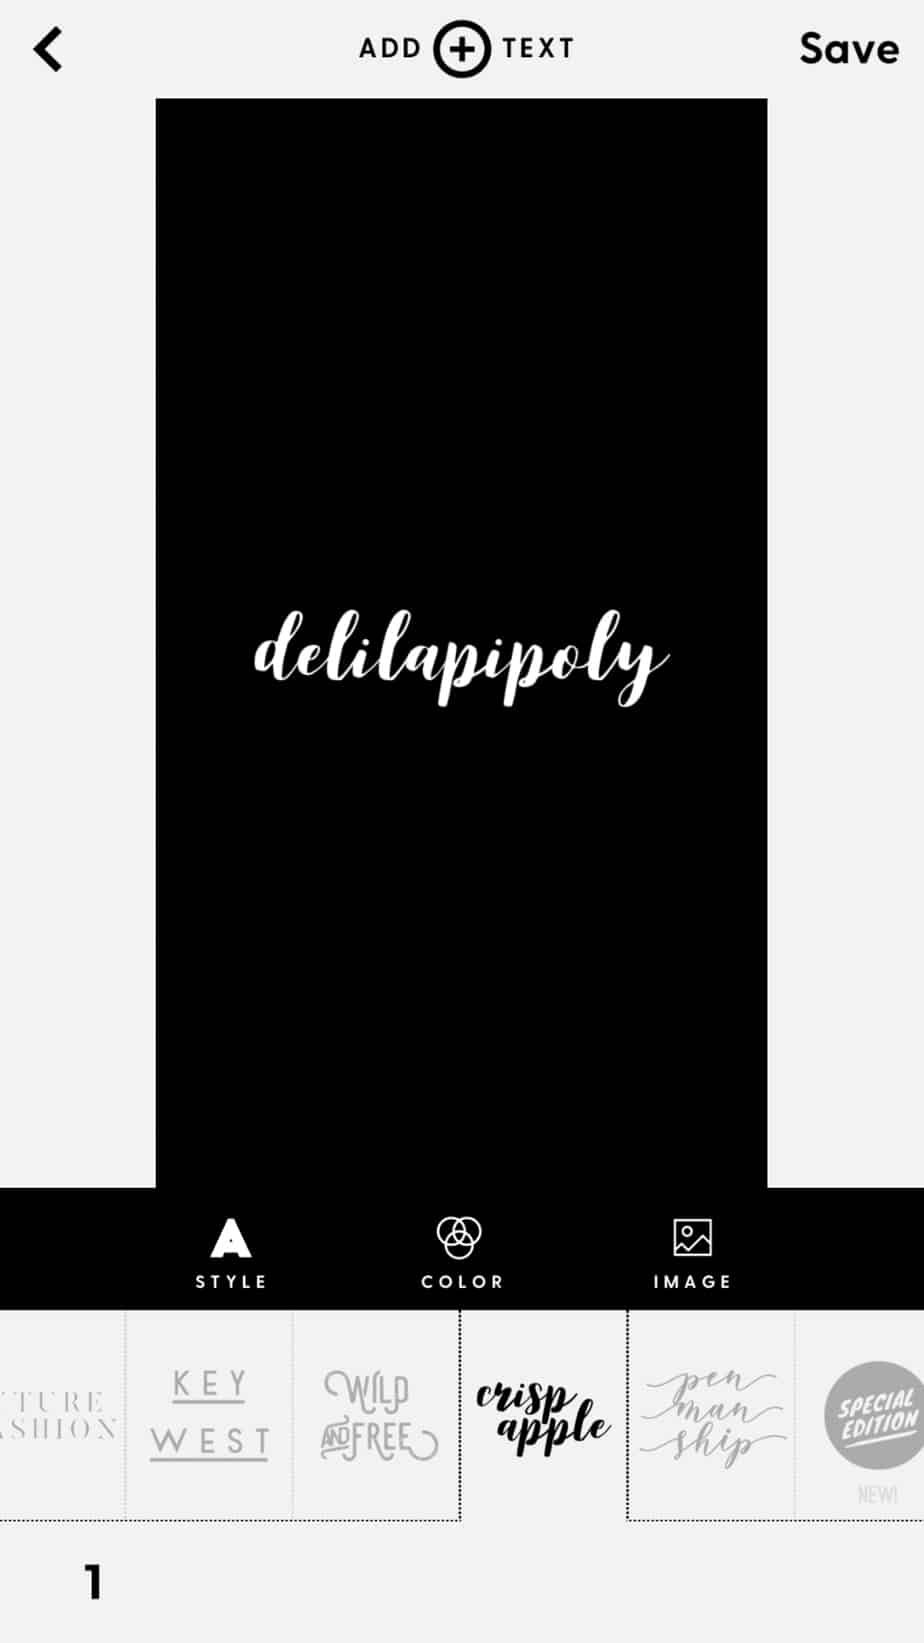
2) Add your text
You can choose your style and colour of your text, or if you changed your mind, you could either pick the "image" option where you can add a filter to the background. You can also adjust the brightness.
To add text press the "+" on the top of the page. To change your text just double tap it.
Don't forget to place at the centre of your template, so it’s easy to add your cover to your highlights. You are all set to share your covers with your audience.
How to add your IG story covers to your Instagram?
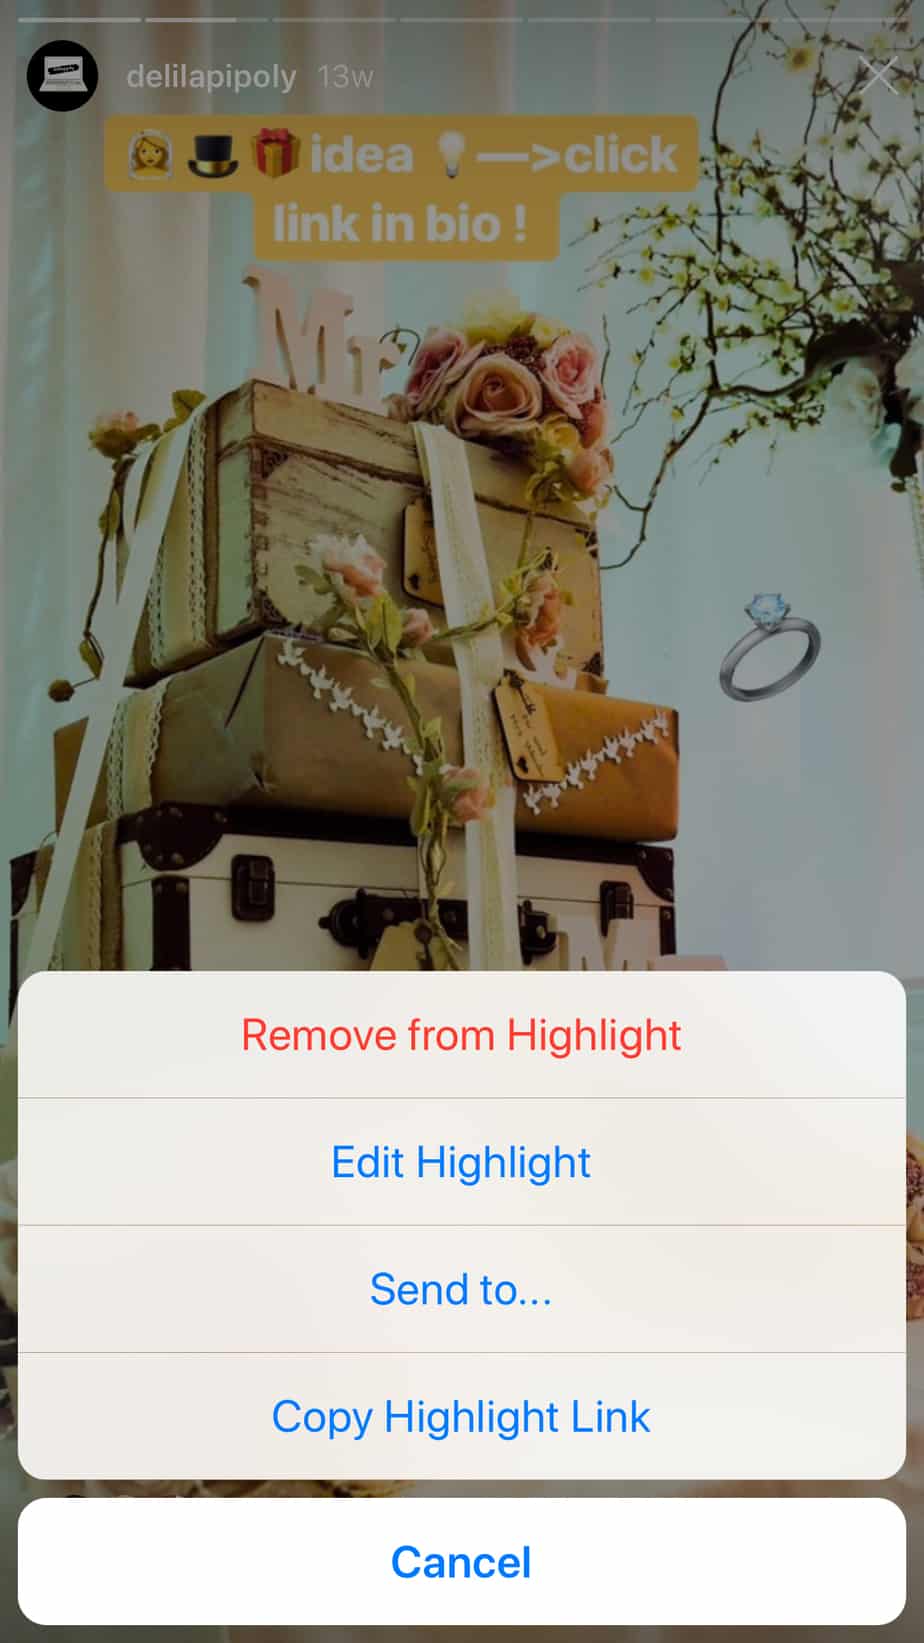
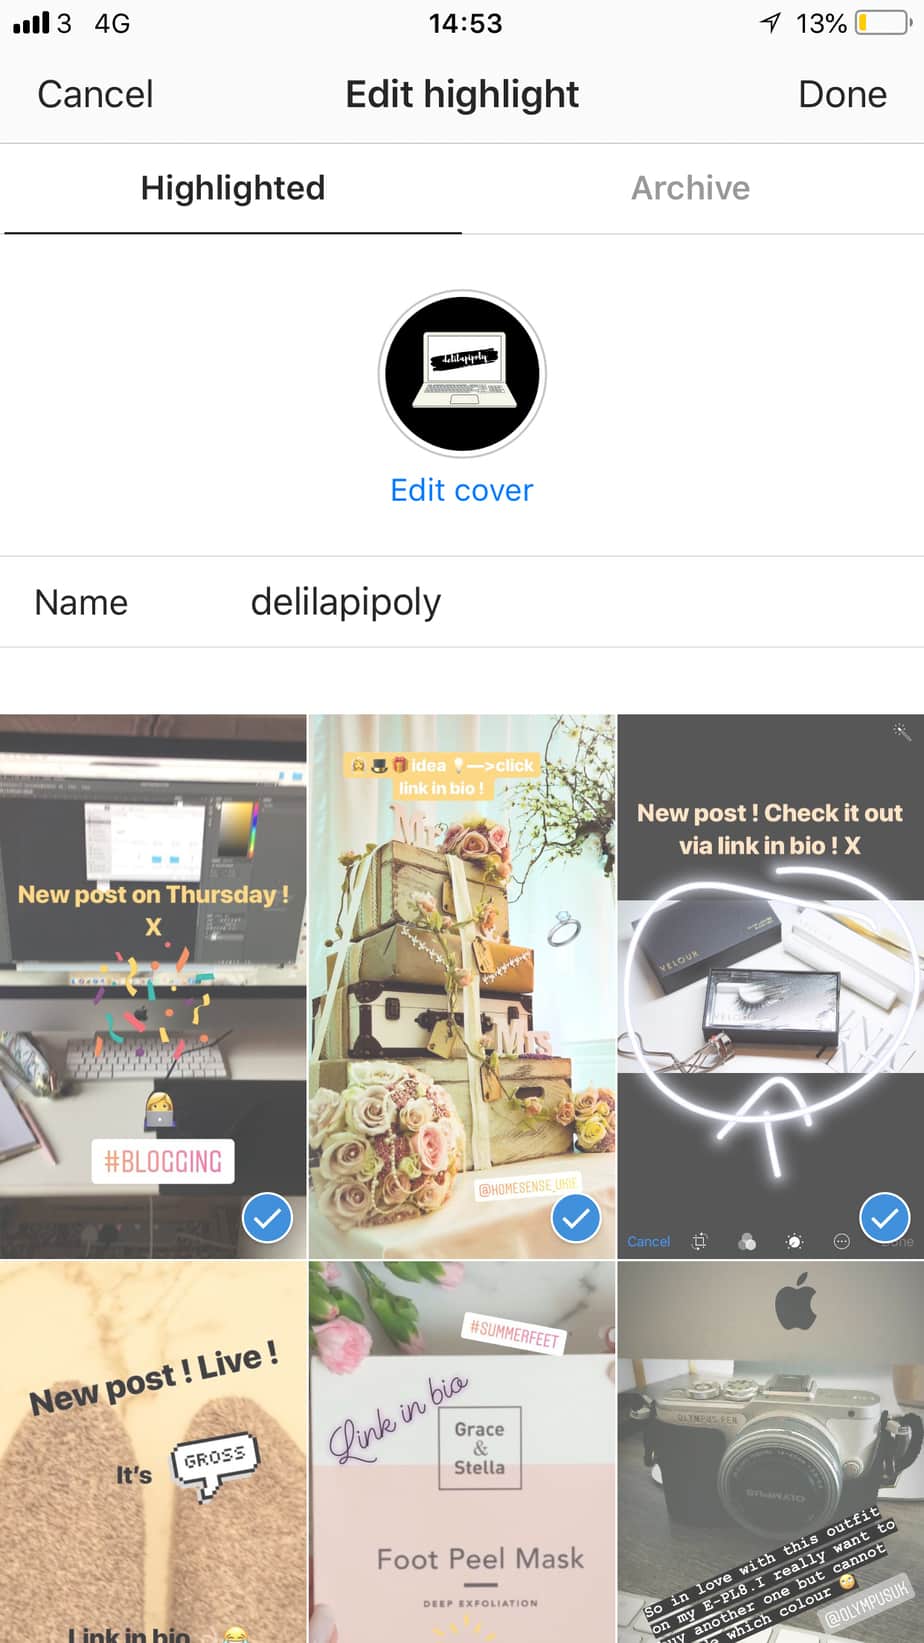
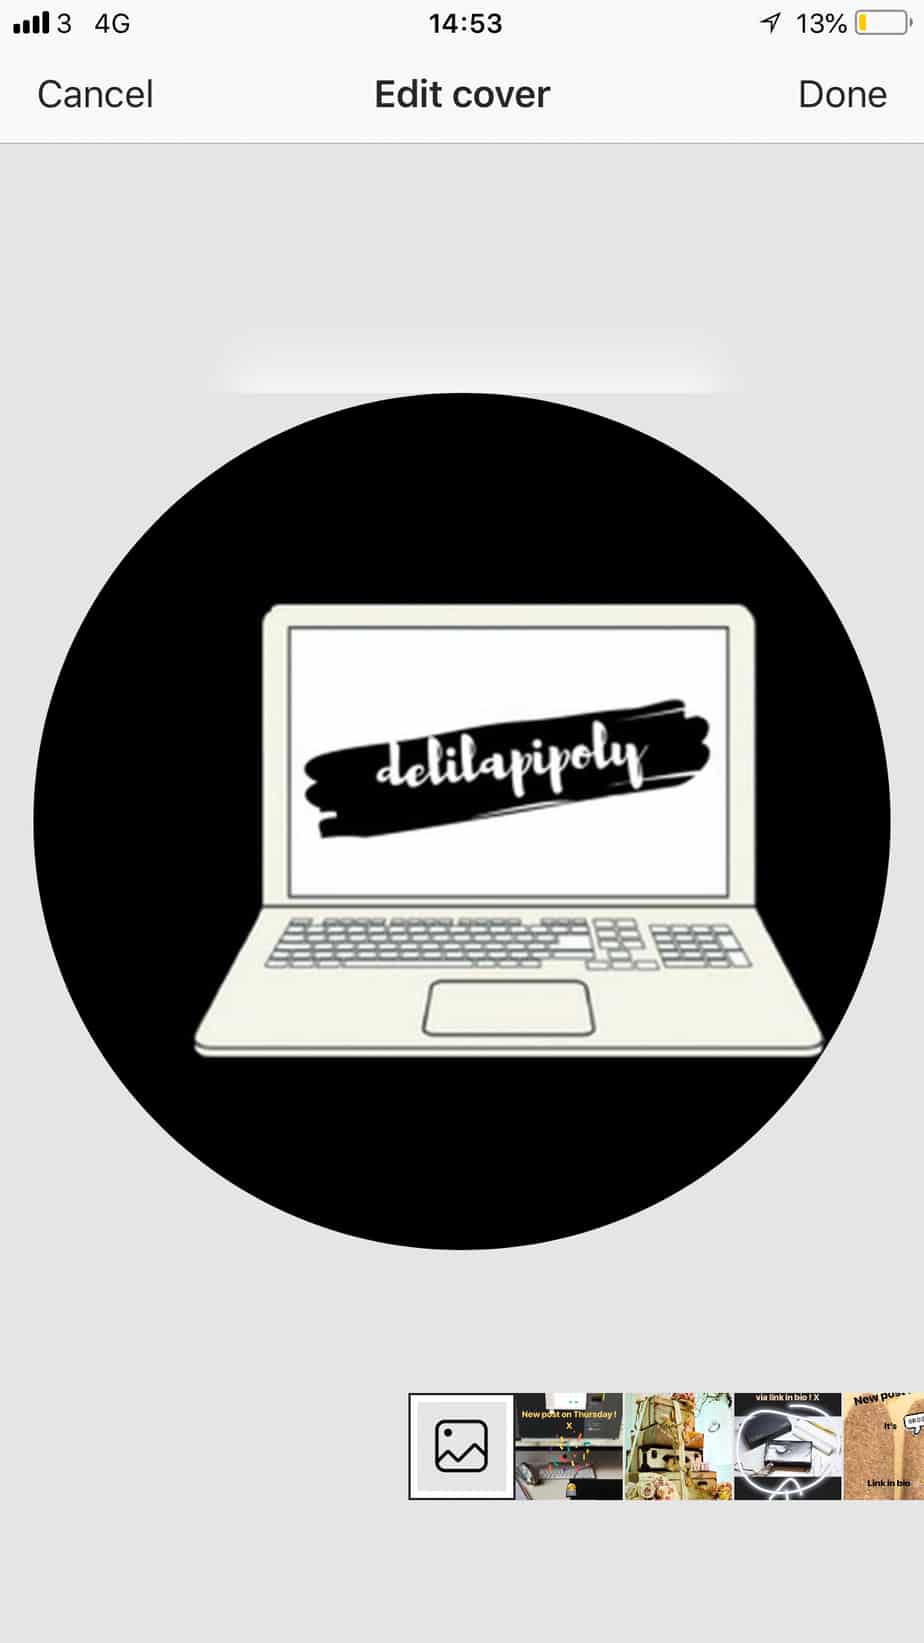
When you had a story for a whole 24 hours, you can highlight it to stay on your Instagram profile. Once you created an IG highlight, you can add your cover. Open your highlight, click on the bottom of the right corner "more ".Now select " edit highlight" and "edit cover". Where it says "name" type in the title of your highlight. You can pick as many categories as you wish. Once everything is set just press "done" on the top right corner.
I hope this tutorial helped you how to create your IG story highlight covers.
See you next time!
Shop the post
Please note, I use affiliate links. Read the disclaimer about affiliate links by clicking on TERMS & CONDITIONS at the bottom of my page.


Like!! I blog quite often and I genuinely thank you for your information. The article has truly peaked my interest.